Wednesday 24 January 2024

Install PostgreSQL in Ubuntu 18.04 – Step-by-Step

 PostgreSQL is open source object relational database system (ORDBMS) that uses and extend SQL language with tons of features. It is one of the most sought after RDBMS with many advance features like transactions and concurrency without read locks and more.

The feature rich PostgreSQL helps developers to build applications at ease. Further, a PostgreSQL administrator can easily build fault tolerant environment for PostgreSQL, protect data integrity and manage data-set very efficiently.

In this tutorial, we will explore how to install and configure PostgreSQL along with PgAdmin in an Ubuntu 18.04 instance in details.

Prerequisites

  • You can SSH into the Ubuntu 18.04 instance using root or sudo enabled user.

Why use PostgreSQL instead of MySQL

Although MySQL is another popular open source relational database management system and is widely used in large and small organization but PostgreSQL has more advanced features as compared with MySQL and is termed as open-source version of Oracle.

Let us quickly find out few aspects where PostgreSQL has an advantage over MySQL.

  • PostgreSQL supports analytic function, which is a way to compare and contrast data stored in the database whereas MySQL does not support analytical function.
  • PostgreSQL offers data types to store IPv4, IPv6, and MAC addresses (Network Address Type) whereas MySQL does not support this feature.
  • PostgreSQL features materialized views that allow you to store the result of a query physically and update the data periodically.
  • PostgreSQL supports CHECK constraint that constrains the value of columns in the table based on a Boolean expression.
  • PostgreSQL support FULL OUTER JOIN to query data from two or more tables.
  • PostgreSQL supports Partial indexes, Bitmap indexes, Expression indexes.
  • PostgreSQL supports JSON and other NoSQL features like native XML support and key-value pairs along with indexing JSON data for faster access. MySQL supports JSON data type but without NoSQL feature. Indexing of JSON is also not supported in MySQL.

Therefore, to avail the benefits of advanced features of relational database management system, it is a good idea to use PostgreSQL.

Install PostgreSQL 11 in Ubuntu 18 – Step-by-Step

Add the PostgreSQL repository

The first thing that you need to do while installing PostgreSQL is to add the repository meant for it. So to do that run the following command from the terminal:

# tee /etc/apt/sources.list.d/postgres.list
deb http://apt.postgresql.org/pub/repos/apt/ bionic-pgdg main

Import signing key

The next step involves fetching the signing key and import it in your system.

# wget https://www.postgresql.org/media/keys/ACCC4CF8.asc
# apt-key add ACCC4CF8.asc

Install PostgreSQL

Finally update the system and install PostgreSQL 11.

# apt update
# apt install postgresql-11

Once PostgreSQL has been installed successfully, the postgres service will run automatically. Issue the following command to find the status of PostgreSQL server.

# systemctl status postgresql

During installation process, following users and a database will be created.

  • A Linux user by the name postgres will be created. All data files and processes meant for running PostgreSQL server will be owned by this user.
  • One database by the name postgres will be created.
  • A PostgreSQL user also by the name postgres will be created.

Connect to PostgreSQL server

To connect PostgreSQL server, you can use a PostgreSQL clients like psql or by using any other application of your choice. The client connect to the PostgreSQL server by using one of the IPC mechanisms, either through Unix domain sockets or through TCP sockets.

The advantages of using Unix domain sockets is its ability to validate the system user id of client connection.

By default, the PostgreSQL server listens for connections through Unix domain sockets only. Lets connect to the PostgreSQL server by leveraging the system user postgres.

Navigate to the shell of system user(Linux) postgres using the following command.

# su - postgres

Now type psql from the shell of postgres.

postgres@pg:~$ psql
psql (11.4 (Ubuntu 11.4-1.pgdg18.04+1))
Type "help" for help.

postgres=#

There are three ways to authenticate users in PostgreSQL and they are:

  • Peer method trust the identity of any LINUX users. Therefore it will not ask for any password
  • MD5 method will always ask for a password and validates after hashing with MD5
  • Trust will never ask for a password and will always trust any connection

The default method of authenticating local (Linux) user is peer. That is why we were able to connect PostgreSQL server earlier. Trying to connect to the PostgreSQL server using password based scheme at this moment will results in Peer authentication failure.

root@pg:~# psql -U postgres
psql: FATAL: Peer authentication failed for user "postgres"

To implement password based authentication scheme, first of all, update the password for PostgreSQL user postgres.

To do that run the following set of commands from the terminal.

root@pg:~# su - postgres
postgres@pg:~$ psql
postgres=# ALTER USER postgres PASSWORD 'myPassword';
ALTER ROLE

Next edit the PostgreSQL configuration file and change the connection method to MD5 from peer for user postgres.

# vi /etc/postgresql/11/main/pg_hba.conf
...
...
# Database administrative login by Unix domain socket
local all postgres md5
...
...

Save the file and restart PostgreSQL server and from now onward you will be able to connect to the server by using password based authentication scheme and this will make your server more secure.

# systemctl restart postgresql
# psql -U postgres

Password for user postgres:

psql (11.4 (Ubuntu 11.4-1.pgdg18.04+1))
Type "help" for help.

Install pgAdmin 4

pgAdmin is an open source, web based GUI administration tool for managing PosrgreSQL instances. With pgAdmin, one can configure PosrgreSQL database settings, monitor performances and even write SQL queries.

To install pgAdmin 4, just issue the following command from the terminal. This will install few other additional packages and dependencies.

# apt install pgadmin4 pgadmin4-apache2

During installation process, pgAdmin will prompt for providing an email id which in turn will be used as an admin login id for the pgAdmin 4 web interface.

Next the installer will prompt for the administrator’s Password.

The installation of pgAdmin 4 will be over within a minute. Point your favorite web browser to http://your_ip_address/pgadmin4/ and subsequently you will be greeted with a login page.

Install pgAdmin 4 Ubuntu

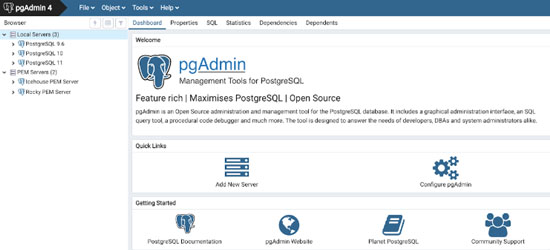
Provide the email address and password that you had supplied during the installation process and hit the ‘Login’ button. You will be redirected to PgAdmin4 dashboard.
Install pgAdmin 4 Ubuntu

To add a PostgreSQL instance, choose the “Add New Server” option from the dashboard. A popup page will appear. Provide the name of the connection under ‘General’ tab.

Under connection tab, provide host name or address of PostgreSQL server, port number, username and password. The password is the same that we have updated using PSQL previously. Hit the “Save” button to complete the process.
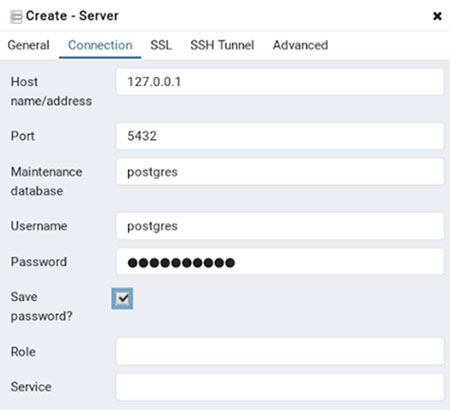
Install pgAdmin 4 Ubuntu 18

The newly added PostgreSQL instance will be added immediately in the left sidebar under “Servers” section.

Add few more instances of PostgreSQL instance and administer them though web interface of PgAdmin 4 at ease.

Closing Thoughts

In this tutorial we have explored about the advantages of PostgreSQL over MySQL, then go into the detail and shared step-by-step guide for installing PostgreSQL in Ubuntu server configuring the database to work with Ubuntu 18.04.

Apart from installing the PostgreSQL we also explored and showed how to install and configure pgAdmin 4 (client for PostgreSQL ) and shown how to administer PostgreSQL database using pgAdmin 4 in Ubuntu 18.04.

To know more about PostgreSQL, you can always browse its official documentation.

This PostgreSQL installation is also applied to the Ubunut 16 and earlier versions with slightly and sometime no change at all in running and executing installation and configuration commands.

How to Setup Rsyslog in Ubuntu 16/18

 Rsyslog is a high performance and secure logging system that has started its journey as a regular syslog daemon and evolved into one of the powerful logging systems in most of the Linux distributions.

Rsyslog is incredibly fast that can pump over one million messages per second to any local destination.

Rsyslog follows typical client-server paradigm i.e. it can be configured to run as a centralized log server and as a client in individual systems/devices to send their log files to the logging server.

This tutorial covers installation and configuration of a centralized syslog server using rsyslog followed by setting up a rsyslog client to send log events to rsyslog server.

Prerequisites

  • You can SSH into Ubuntu 18/16 system using root or sudo enabled user.

How to Install & Setup Rsyslog Server in Ubuntu

Rsyslog is installed by default in Ubuntu 18/Ubuntu 16. You can verify if rsyslog is installed previously by using the following command:

# rsyslogd -v

However, if you find rsyslog is missing in your system, you can always install it by using the following command in the terminal.

# apt install rsyslog

Once installed, enable and run rsyslog service:

# systemctl enable rsyslog
# systemctl start rsyslog
# systemctl status rsyslog

Configure Rsyslog Server

By default, rsyslog server runs as a client mode and uses imjournal and imusock module to import log events from systemd journal and accepting syslog events generated by applications in the local system respectively.

Open the rsyslog configuration file to verify this.

# vi /etc/rsyslog.conf
...
...
# The imjournal module bellow is now used as a message source instead of imuxsock.
$ModLoad imuxsock # provides support for local system logging  (e.g. via logger command)
$ModLoad imjournal # provides access to the systemd journal
...
...

To enable rsyslog run in server mode, you need to enable protocol and port number on which it will receive log events from remote systems. Two protocols are used to facilitate reception of log events from remote system and are TCP and UDP.

The first one is secure and connection oriented scheme while the second one is not connection oriented may suffered from message losses.

However in some situations, you may want to use UDP protocol like receiving log events from a remote system in the local subnet where there are less chances of message losses.

Further few network devices able to communicate with UDP protocol only.

To enable log events reception in port number 514 using TCP protocol, enable the following two lines in rsyslog configuration file.

# vi /etc/rsyslog.conf
...
...
# Provides TCP syslog reception
$ModLoad imtcp
$InputTCPServerRun 514
...
...

Similarly enable UDP log event reception in port number 514. There is no harm in running both the protocol in the same port.

# vi /etc/rsyslog.conf
...
...
# Provides UDP syslog reception
$ModLoad imudp
$UDPServerRun 514
...
...

At this point, you need to define a template that will be analyzed by rsyslog server before receiving the incoming log events. The template instructs rsyslog server where to send the incoming log events. It can be a file in the local file system or another syslog server.

Make sure to place the template line after $ AllowedSender line:

...
...
$template incoming-logs,"/var/log/%HOSTNAME%/%PROGRAMNAME%.log"
...
...

Next define a rule-set to process incoming log events. The format to define a rule is like follows:

Facility.Severity     Level     Destination

Where the facility can be one of the following:

  • kern – Kernel log events (0)
  • user – User-level log events (1)
  • mail – Mail system log events (2)
  • daemon – System daemon log events (3)
  • auth – Security and authorization log events (4)
  • syslog – Internally generated syslog events (5)
  • lpr – Printing system log events (6)
  • news – News daemon log events (7)
  • uucp – Unix-to-Unix copy program (uucp) daemon log events (8)
  • cron – cron daemon log events (9)
  • authpriv – Security and authorization log events (10)
  • ftp – FTP daemon log events (11)
  • ntp – NTP log events (12)
  • security – Audit daemon log events (13)
  • console – Alert log events (14)
  • solaris-cron – scheduling daemon log events (15)
  • local0 – local7 – Locally defined application log events

The severity level along with their numerical codes are:

  • Emergency (emerg, 0) – Panic messages signifying system is unusable (0)
  • Alert (alert,1) – Action must be taken immediately (1)
  • Critical (crit , 2) – Critical conditions (2)
  • Error (err, 3) – Not so urgent messages (3)
  • Warning (warning, 4) – Warning messages (4)
  • Notice (notice, 5) – Normal but significant messages (5)
  • Informational (info,6) – Informational messages (6)
  • Debug (debug, 7) – Debug level messages (7)

For example, if you want to send all mail related log events to local file system then the following rule will do that for you:

mail.* /var/log/mail

Where * in mail.* signifies to include all severity level for facility mail.

Suppose you want rsyslog server to process log events related to all facility and severity levels then the rule becomes:

*.* /var/log/all

Now combine template and the rule set in the rsyslog configuration file after $ AllowedSender line.

# vi /etc/rsyslog.conf
...
...
$template incoming-logs,"/var/log/%HOSTNAME%/%PROGRAMNAME%.log"
*.* ?incoming-logs
 & ~
...
...

The line “& ~” instruct rsyslog server to stop processing the log event as soon as it is written to the file. Save the file and restart rsyslog server.

# systemctl restart rsyslog

Verify if rsyslog server is listening in the configured port by using the following command:

# ss -tunelp | grep 514
udp    UNCONN     0      0         *:514                   *:*                   users:(("rsyslogd",pid=7486,fd=3)) ino:37269 sk:ffffa0c29cba5100 <->
udp    UNCONN     0      0        :::514                  :::*                   users:(("rsyslogd",pid=7486,fd=4)) ino:37270 sk:ffffa0c2a7828980 v6only:1 <->
tcp    LISTEN     0      25        *:514                   *:*                   users:(("rsyslogd",pid=7486,fd=5)) ino:37273 sk:ffffa0c29c9e26c0 <->
tcp    LISTEN     0      25       :::514                  :::*                   users:(("rsyslogd",pid=7486,fd=6)) ino:37274 sk:ffffa0c29fd51080 v6only:1 <->

The rsyslog server is now ready to receive log events from remote system in the port 514 using TCP/UDP protocol.

Configure Firewall in Rsyslog Server

If you are using uncomplicated firewall manager(UFW) and is enabled in the system then allow it to receive log events in the designated port(514).

To do that, just issue the following set of commands in the terminal.

# ufw allow 514/tcp
# ufw allow 514/udp
# ufw reload

How to Setup & Configure Rsyslog Client

You are already aware that by default rsyslog runs in client mode. Hence you just need to install rsyslog in the client machine and configure it to send log events to rsyslog server.

Start by installing rsyslog in the client system if it is not installed previously.

# apt install rsyslog
# systemctl enable rsyslog

Now configure rsyslog in the client system to send all log events to remote rsyslog server that we configured in the previous step.

To do that, edit the rsyslog configuration file and add a line with following format in the rules section.

*.* @ip-address-of-rsysog-server:514

OR

*.* @@ip-address-of-rsysog-server:514

The @ before IP address of rsyslog server indicates rsyslog client to send log events to UDP port whereas @@ signifies to send the log events to TCP port.

# vi /etc/rsyslog.conf
...
...
#### RULES ####
...
...
*.* @10.160.0.5:514
...
...

Restart rsyslog daemon:

# systemctl restart rsyslog

Head over to rsyslog server and navigate to the /var/log/ folder to find a folder by the name same as hostname of remote client. Change to the folder to list all the log files.

Conclusion

Rsyslog is an open source, client/server central log processing system. It’s a high-performance logging system for Linux operating system.

You can now setup a centralized log server using rsyslog that can receive and store log events from remote client. Further, this tutorial also covers how to forward log events to centralized log server using rsyslog client.

This article shows you the basic use of Rsyslog system, there are a ton of things you can do with it, if you wanted to dive more details into it, head over to the official documentation of Rsyslog.

15+ Cheap Cloud Server Hosting Providers

 If you are on hunt of cheap cloud servers for your website, game server etc, then you’ll love this article, where we tested and reviewed over 15 cheap cloud server hosting providers.

Choosing the cheap and best cloud hosting is not easy task, there are hell lot of things you need to consider before deciding the one to stick with. Also this is not a formula of “one size fits all”, at the end of the day it depends on what you were using the server for? What about the resources you need? What operating system? Where is the location of the server? What are your scale-ability requirements?

There is not going to be a solid answer of who is the “best” cloud hosting company. It all depends on one’s preferences and experience; each person will have different factors to determine which host is good for them.

So before moving ahead keep in mind that this list is not the final get to go, there are other cloud hosting providers out there each with different features and solutions, the list is prepared based on our research at the time of writhing this blog post, new providers can be added/deleted from the list.

Here is the list of cheap cloud servers in no particular order.

Top 15 Best Cloud Hosting Services in 2021

#1 DigitalOcean

Cheap Cloud Servers Reviews

DigitalOcean one of the well known cloud hosting provider, they proud of being host of big brands such Xerox, Salesforce, RedHat etc. their servers are located around the globe in USA, Canada, Europe, India and Singapore. Their lowest plan starts from as low as $5 or $0.007 per hour, you pay for what you use, they charge bill by hour. However they do charge you 100% regardless of your servers is turned on or off.

Don’t confuse with the term “droplet” they use it for “cloud server”. Setting up a new “droplet” is super simple, it takes only around 1 minute to make your server online. View their plans.

#2 Vultr

Cheap Cloud Servers Reviews

All the servers of Vultr are Intel powered and use SSD, their cloud servers spanning the globe, available in 14 cities including USA, Europe, Tokyo and Sydney (as of writing this article). The cloud servers run on KVM-based platform, so you only get several cloud features such as hourly billing, fast deployment and multiple locations etc.

Their lowest plan starts with $5 per month with below features:

  • 768 RAM
  • 1 CPU
  • 15 GB SSD
  • 1000 GB bandwidth

The price is same as of DigitalOcean but they are providing 20 GB SSD instead of 15 GB SSD but Vultr provides you more RAM 768 MB instead of 512 MB, overall both providing almost matching features at the same price. View their plans

#3 iwStack

Cheap Cloud Servers Reviews

iwStack, a part of Prometeus cloud services, is a flexible and powerful cloud hosting provider. All their cloud servers are powered with CloudStack. Their billing is hourly basis, but what make them apart from other cloud hosts is they don’t charge you unless you actually use their services. Most of the cloud providers charge you even if your server is offline (i.e. you only created a cloud server & not using it).

The lowest plan starts with 2.16 (0.0003 per hour) with following configuration:

  • 512 MB RAM, 1 vCPU
  • Transfer 2 TB (incoming free)
  • 10 GB SSD

They have a price calculator that shows you how much your setup will cost. iwStack have expanded to the US and added a second data center in Milan, Italy. Visit their site

#4 LeaseWeb

Cheap Cloud Servers Reviews

LeaseWeb offers different kinds of virtualization including cloud servers with hourly or monthly billing cycle. You can deploy cloud server in minutes, and server can be scale as per your requirement and you have 10 different locations across the United States to host the server.

All cloud servers come with standard SSD and Intel Xeon processors. The $5.50/month plan offer 1 vCPU core, 1GB vRAM, 40GB SSD Storage and 4TB Traffic.

View their different plans here

#5 VexxHost

Cheap Cloud Servers Reviews

VexxHost infrastructure is largely powered by OpenStack. It offers instant and fast Linux or Windows cloud server that can be up and running within 30 seconds! VexxHost starter plan starts with $5 per month or hourly billing with 2 vCPU cores, 1GB RAM, 40GB SSD and 4TB transfer.

They have built their own control panel to manage cloud servers which offer the most advanced management features at the easiest way possible. view their plans

#6 Atlantic

Cheap Cloud Servers Reviews

Atlantic cloud hosting offers you either Linux hosting or Windows hosting but their price is not cheap compare to other, you can sign up for their cloud hosting under $10 ($9.93/month). You can also install a control panel on your cloud if you like.

All their servers are of enterprise SSDs, and offer unlimited inbound data transfer. Their data centers are in USA, Canada, Europe, and soon they will be in Singapore.

View their plans https://www.atlantic.net/cloud-hosting/on-demand/pricing/

#7 OVH

Cheap Cloud Servers Reviews

OVH.com is the 3rd web hosting provider worldwide. They are using OpenStack KVM infrastructure to power their cloud servers, all their servers having SSD with solid RAID 10 setup, they also provide DDoS Protection.

At a starting price of $4.49 per month you will get 1 vCore, 2 GB RAM, 10 GB SSD Local RAID 10 and Unlimited traffic. Choose the data center from these locations North America, Western Europe, Central Europe or Paris.

View their plans https://www.ovh.com/ca/en/vps/vps-ssd.xml

#8 Quadranet

Cheap Cloud Servers Reviews

They have affordable cloud hosting (they called it as InfraCloud )options starting from $5.81/month or $0.0079/hour with features like 1 vCore, 512 MB RAM, 15 GB SSD, 1000 GB. For this price you would normally expect typical shared hosting.

Operating systems option are CentOS, FreeBSD & Windows. Their data centers are in Los Angeles, Dallas, Miami, Atlanta, and Chicago.

View their plans https://www.quadranet.com/infracloud/

#9 CloudVPS

Cheap Cloud Servers Reviews

CloudVPS is the number one cloud provider in the Netherlands. It has introduced the first real public OpenStack cloud in Europe. Their infrastructure is powered with OpenStack. You have choice of Linux or Windows OS. You can get started with their cloud server at $8.45/month plan with features of 1 GB RAM, 16 GB SSD, 1 Core, and 250 GB transfer.

All their data centers (3) are in Amsterdam, Netherlands. This is purely for those who looking to host in Europe.

View their plans http://www.cloudvps.com/openstack/pricing/

#10 Linode

Cheap Cloud Servers Reviews

Linode is not the cheap but you can get started with them under $10 (their plans starts from $10/month OR $0.015/hour) which includes 2GB RAM while most of the other only offer 1GB or less, you get double the amount of RAM.

If you are expecting some heavy lifting work from your cloud server then Linode could be great choice. Have a look at their different hosting plans here https://www.linode.com/pricing

Their servers are located in 8 different data centers around the world, including North America, Asia Pacific and Europe. Though their pricing may not entice customers who are on a low budget, but the quality of their service is more than justifies the price.

#11 InterServer

Cheap Cloud Servers Reviews

OpenVz or KVM cloud VPS from InterServer with starting price of $6/month having features such as 1 core processor, 1GB memory, storage of 25GB and 1TB Transfer. InterServer offers more location options to choose. As of now there are 6 locations worldwide NJ (east coast), Los Angeles, CA (west coast), Houston, TX (mid western), London, Paris and Hong Kong.

Go to their plans page https://www.interserver.net/vps/

#12 Exoscale

Cheap Cloud Servers Reviews

Take advantage of strict data privacy of Switzerland by hosting at Exoscale, an EU based hosting provider. Plans starting from $ 6/month with configuration 512MB RAM, 1 CPU core, 10 GB SSD and first 100 GB free outbound traffic. Note that if you need Windows OS then you have to spend extra money as Windows is not available under this plan. Your server will be up and running in an average 30 seconds time. Datacenter is in EU only.

Go to their plans page https://www.exoscale.ch/pricing/#/compute/micro

#13 PhotonVPS

Cheap Cloud Servers Reviews

PhotonVPS provides cloud VPS hosting for Linux or Windows. Each plan includes instant setup, SSD storage, proactive server monitoring, and DDoS mitigation. The starter plan having features: 512MB RAM, CPU1 Core, 20 GB SSD RAID-10 storage, up to 64 TB Transfer for only $5.95/month. All cloud servers are currently housed in 3 different datacenters in the US.

Go to their plans page https://www.photonvps.com/linux.html

#14 UpCloud

Cheap Cloud Servers Reviews

This cloud hosting service is not the cheapest on this list but with good reputation and configuration at $10/month, UpCload is here with decent features like 1 GB Memory, 1 CPU Core, 2 TB Transfer and you can deploy your high performance cloud server in under 30-45 seconds. Their servers are powered by MaxIOPS – their proprietary storage technology built on enterprise-grade SSD hardware which is 2x faster compared to industry-standard cloud hosting. Cloud server can be deployed in their 4 datacenters i.e. Chicago, London, Helsinki (Finland) and Frankfurt.

Go to their plans page https://www.upcloud.com/pricing/

#15 LunaNode

Cheap Cloud Servers Reviews

Deploy a reliable, fast and feature rich cloud server in seconds available in datacenters around the world (Toronto, Montreal or France). The least plan is available at as cheap as $3.6 per month ($0.005 per hour) with features like 512 MB RAM, 1 Virtual Core, 15 GB SSD-Cached Storage, 1000 GB Bandwidth. All cloud servers are built on top of the OpenStack platform and KVM virtualization.

Go to their plans page https://www.lunanode.com/pricing

Final words

We hope the list helps you pick the cheap and best cloud server at affordable budget. The list is for budget oriented consumers who looking for a server with essential features, in case you think we missed a good cloud hosting – let us know by contacting us.

WHMCS Alternative – Top 10 Reviewed

 Hopefully you are already using WHMCS and not satisfy with its features and/or price, or you are someone who wants to move to new hosting billing management software or just looking for what options you have other then WHMCS when it comes to hosting billing application.

Whatever your intention is, you have come to the right place where you will find the best WHMCS alternatives in 2023.

Some of the listed below apps are open source and free of cost and while few of them are specifically designed to target SMB and full-fledged and come with all features you can imagine from a billing software, so without a further ado, here are the top 10 WHMCS alternatives.

  1. WHMCS
  2. ODIN
  3. Bill Manager
  4. HostBill
  5. BLESTA
  6. BOX Billing
  7. UberSmith
  8. Clientexec
  9. Nukern
  10. BillingServ

10 Best WHMCS Alternatives to Try in 2023

1 – WHMCS

WHMCS

It’s not a WHMCS alternative in fact its WHMCS itself, we thought to put this one first because, if you are unaware of it, you first get yourselves familiar with WHMCS itself.

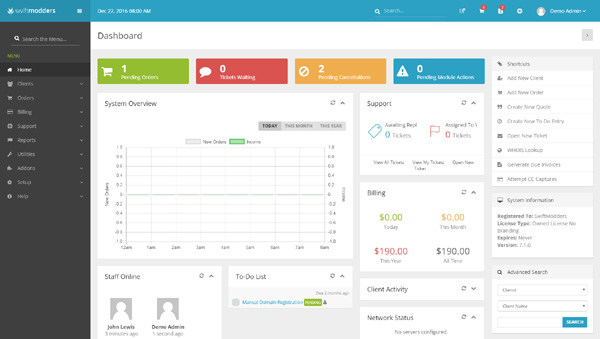
They claim to be the leader in web hosting billing software. It is hard to fault them from that point of view too. The software is able to support multiple currencies. It can offer quotes. You can set up recurring billing. One of the things that we really love about WHM CS is the fact that your clients will be able to profound their account. You can even offer them credits if you wish. The software can even apply late fees automatically to your bills.

2 – ODIN

WHMCS Alternative Odin

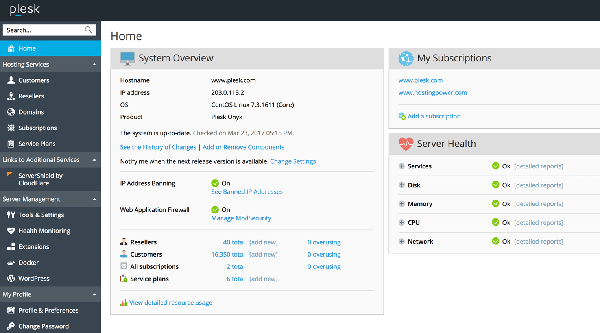
Odin offers the ideal solution for individuals seeking unparalleled automation in their business operations. It boasts a wide range of services that can be seamlessly updated, particularly those integrated with Plesk. Odin even facilitates automatic domain registration. The true beauty of Odin lies in its comprehensive corporate package, enabling efficient management of accounts, online stores, and effortless IP assignments.

With support for more than 50 diverse payment gateways, Odin ensures that no customer is ever lost due to payment limitations. This extensive coverage guarantees that every customer can conveniently complete their transactions without any hindrances.

Why Choose ODIN over WHMCS?

  • Automation Advantage: Odin provides better automation capabilities, with automatic updates, domain registration, and streamlined management of accounts, online stores, and IP assignments.
  • Complete Corporate Solution: Odin offers a comprehensive package, serving as an all-in-one platform for various business needs.
  • Extensive Payment Gateway Support: Odin supports over 50 payment gateways, ensuring customers can easily complete transactions without limitations.
  • Integration with Plesk: Odin seamlessly integrates with Plesk, enhancing user experience and simplifying management tasks.

3 – Bill Manager

WHMCS Alternative BillManager

If you have a limited number of clients, BILLmanager may be the the best alternative to WHMCS. It is free to use for your first 50 clients. BILLmanager aims to automate the process of hosting as much as possible. All payments will be taken automatically.

There is even a facility inside the software which will enable you to automatically manage and suspend hosting. For the real “hands off” approach, there is even a client portal which means you barely have to interact with your clients. This makes life even easier for you.

The real highlight of BILLmanager is the simplicity of using it. You do not even have to think about tax regulations in various countries as that is automated too!

Why Choose BILLmanager Over WHMCS?

  • Focus on Hosting Providers: BILLmanager is specifically designed for hosting providers, offering specialized features and functionalities tailored to their specific needs.
  • Simple Pricing Structure: BILLmanager has a straightforward and transparent pricing structure, making it easier for businesses to understand and budget their expenses.
  • Integration with ISPsystem: BILLmanager seamlessly integrates with other products developed by ISPsystem, such as ISPmanager and DCImanager, providing a cohesive ecosystem for managing hosting services.
  • Advanced Billing: BILLmanager offers advanced billing capabilities, including flexible pricing models, automated invoicing, and provisioning of services, enabling efficient management of billing processes.
  • Multilingual and Multicurrency: BILLmanager supports multiple languages and currencies, making it suitable for hosting providers with an international customer base.
  • Robust Security Features: BILLmanager prioritizes security with features like two-factor authentication, IP restrictions, and SSL encryption, ensuring the protection of sensitive customer data.
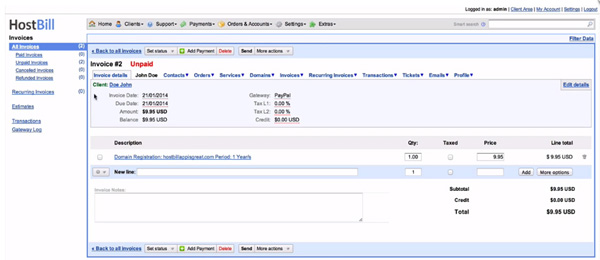
4 – HostBill

WHMCS Alternative HostBill

Host Bill is currently used by over 1000 enterprise customers. When a billing system gets this much usage, you know that it is going to be good. Host Bill can be integrated into over 500 different applications, order pages etc. You can use it to set up domain names.

You can use it to create cPanel accounts. You can use it in the apps you make. It is so simple to use too. This is an affordable solution where you will be able to receive a ton of help from the support staff if you get into a pickle.

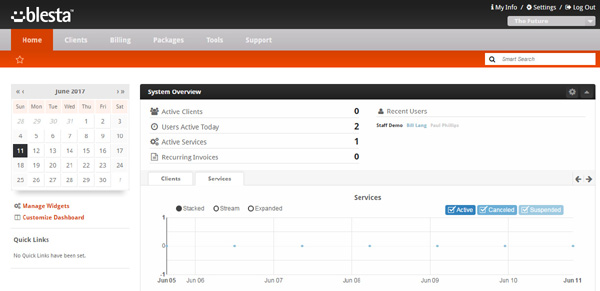
5 – BLESTA

WHMCS Alternative blesta

When it comes to secure hosting billing management software, very little comes close to the quality that BLESTA boasts. Once again, this is an automated solution. There is even a ticket system built into the software so you do not need to have something running separate to your website.

The real standout feature of BLESTA is the way in which you can manage clients through it. There are client profile pages which make it very easy to change various pieces of information about them. The software constantly has new features added to it due to how developer friendly it is.

6 – BOX Billing

WHMCS Alternative BOX Billing

When it comes to ‘easy to use’ software, there is nothing simpler than BOX Billing. Once you have it all installed and set-up, you only need to copy a single piece of code onto your website. One of the reasons why many hosting providers love BOX billing so much is down to the fact that it is probably one of the most customizable pieces of hosting billing management around.

This is because it is open source with a fantastic community behind it. You can add a plethora of add-ons and templates to really shake up what the software can do.

7 – UberSmith

WHMCS Alternative UberSmith

UberSmith may be a small company, but is already making strides in the industry. This is because it is so much more than a hosting billing platform. It can be used for a plethora of jobs. From within UberSmith, you will be able to set up usage-based billing. You can automate payments. You can send out quotes.

You will be able to use the highly customizable tools for work flow management. Of course, the API of UberSmith is well-documented. This means that you will be able to extend the functionality if you wish.

8 – Clientexec

WHMCS Alternative Clientexec

This software is for those who want to completely automate their hosting business. With Clientexec, you will be able to automatically setup hosting accounts and register domain names without any interaction with your business. Accounts will be up and running within minutes.

This means that you will be able to deal with your clients at every moment of every day. There are several modules which can be added to Clientexec. This means that it is able to offer automated payments through a variety of platforms. There is even coupon functionality so you can offer discounts to your clients.

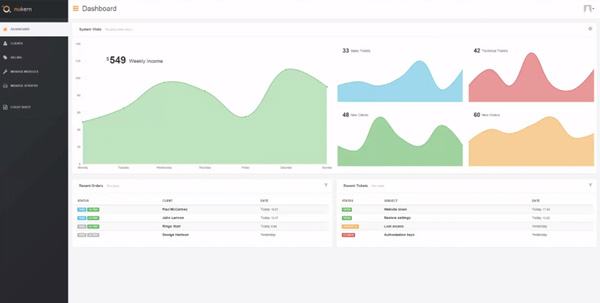
9 – Nukern

WHMCS Alternative Nukern

One of the real highlights of Nukern is the fact that it is priced fairly. You will be paying based upon the number of clients that you have. This makes it a lot easier for you to make profit on what you are selling.

Account creation automation and payment is instant. If you use Nukern in combination with Plesk, you will be pleased to know that it is a ‘match made in heaven’. The dashboard is simple to use too.

10 – BillingServ

WHMCS Alternative BillingServ

This is an award-winning system. Right off the bat, this tells you that it is going to be good. It makes transactions incredibly simple through a variety of different formats. One of the reasons why we love Billing Serv so much is down to the fact that it is so secure.

There is DDoS protection built into it. If there is an intrusion, the company will be on top of it in a flash. Billing Serv can be integrated with cPanel, NameCheap, VPS.net, Enom, and a whole lot more. This makes it very viable as a hosting solution.

10 Best VPN Services Reviewed 2023

 VPN or Virtual Private Network have become extremely popular these days with everyone worried about being tracked and spied on while online.

Apart from being hidden from hackers and government agencies there are number of reasons you could use VPN for accessing internet, such as you want to visit websites that are banned in your country or by your internet service provider, or you want to see Netflix movies or web series that are blocked in your country.

You can overcome these issues easily by using a good VPN service. There are different types of VPN services available for different purposes – an SEO agency might need a different set of features of a VPN service then a normal user who want to visit reddit!

What’s makes a good VPN service? Well there are a number of things you need to look out before you subscribe to a VPN service provider, things such as encryption algorithms, lack of server connection logs, legal jurisdiction, IP leaks protection, support for multiple countries, affordable price, good technical support and multiple device support features makes a VPN service good enough to go with.

We have gathered a list of top ten VPN service provides and compared their features and pricing so that you can get greatest service without wasting your time doing research yourself.

So without a further ado here is the list.

Top 10 Best VPN Services to Try in 2023

1 – Express VPN

Best VPN for PC

Express VPN is one of the top-rated VPN service providers. Their award-winning technology virtually cloaks your internet connection within seconds you sign up and it is able to cover almost all types of devices and operating systems around.

Whether you are using a Smartphone, tablet, set-top boxes or any other device that connects to internet, your original identity can be hidden from the internet. Hiding behind military-grade 256-bit encryption, your device’s IP and other information will remain untraceable.

2 – NordVPN

Best VPN for torrenting

NordVPN service creates a virtual tunnel that protects your device’s IP and the personal data contained in them anytime you connect to the Internet or any unsecured network. Your search history will remain private and undetectable from prying eyes even when connected to public WiFi while away from home.

A single NordVPN account will cover up to 6 different devices including; computers (Windows, Mac, and Linux), phones & tablets (iOS, Android, and Windows), and also covers browsers like Chrome and Firefox.

NordVPN service deliveries high-speed Internet connects virtually anywhere in the world thanks to a massive network of nearly 5500 servers spread across 50+ countries. Cutting-edge encryption keeps your IP and important data protected from prying eyes.

3 – Hide me VPN

Best VPN 2020

Tracking your every move on the Internet is big business these days, thousands and thousands of businesses pay darn good money to get a hold of the information gleaned from tracking your movement while you are online.

Unfortunately, even your ISP is guilty of tracking your movement and in some cases, is more than happy to turn over this information to the government. Hide me VPN is ready to fix that for you and ease your mind every time you connect to the Internet, even when you are in public. Hide me’s encryption technology is powerful enough to ensure that you never have to worry about whether big brother is watching and knows your every move.

Your computer’s IP will remain completely hidden at all times on up to 10 different devices. Hide me is compatible with most of today’s most popular operating systems including Windows, Mac, Linux, Android. Hide me does not keep logs of any of its users to avoid any concern of whether your online activity could become public record.

4 – IP Vanish

Best VPN for streaming

While many of today’s most popular web browsers offer incognito modes to prevent tracking of your browsing history, that is not even close to being secure enough. Your computer’s IP when it is connected to the Internet is the most important piece of information, it enables your every move on the Internet to be tracked and that information can and will be sold to the highest bidder.

IP Vanish VPN service makes it virtually impossible for your computer’s real IP from becoming seen. Its high tech encryption keeps your every move completely invisible. Even when you connect to a public WiFi network you do not have to worry about whether or a hacker, tracker, or even the authorities are trying to get a hold of your personal data or information.

5 – Private VPN

Best VPN reddit

Private VPN service is the most secure of all VPN services around. It features military-grade 2048-bit encryption, which makes it the most secure system available. Using Private VPN’s service gives you instant access to its ultra-high-speed network.

Imagine streaming HD content without slowing down, downloading even massive files in no time, and surfing the web without being slowed down at all. To ensure your online experience is memorable and there is absolutely no slowdown by strategically placing 100 servers in 60 countries.

Your Private VPN account covers up to 6 different devices simultaneously from being tracked online. Unlimited bandwidth and connection speed without worry of your IP being tracked.

6 – CyberGhost VPN

Cyberghost VPN review

With CyberGhost’s military-grade encryption technology your computer’s IP will never be seen as long as you are being protected. For gamers, no worries about being Geo-restricted because of where you live. No more being blocked from websites, your computer’s actual IP will remain a secret.

CyberGhost does not keep any logs of any of its customer’s online activities. Their service uses strategically places servers all over the world to ensure that you will not experience any reduction in performance no matter where you or your devices are in the world. No worries about your data being hacked or stolen even when you are connected to a public WiFi network.

7 – SurfShark VPN

SurfShark VPN Review Reddit

SurfShark VPN service is a highly secure provider that creates a virtual bubble around your web presence. Since your computer’s real IP cannot be seen you cannot be tracked by your browser and your ISP cannot track you either.

By preventing your IP they cannot intentionally charge you more for things because they think that you live in an affluent area. Using superior encryption everything on your computer is safe and cannot be tracked. Imagine how comforting is knowing that no one will be able to see any of the websites you decide to visit.

Since many ISP’s have been known to gather and sell the information that it gleans from tracking you online and then turn around and sell it to the highest bidder.

8 – Ultra VPN

Ultra VPN Review

Ultra VPN puts the emphasis on speed and reliability, with no worries about you be hacked or snooped on by your ISP or anybody else for that matter. Once you are connected to the Ultra VPN tunnel no one will know who or where you are or where you have been while you are surfing the Internet.

Hidden deep behind a powerful wall of military-grade encryption your valuable IP and personal information is safely hidden from sight. No more worries about being Geo-locked or blocked from going to any site because of limitations set up by governments.

For an extra layer of protection, not even Ultra VPN keeps logs of your website history during your online surfing.

9 – Fastest VPN

Best VPN for Mac & PC

If you are needing a high-speed and highly secure Internet connection, you cannot go wrong with Fastest VPN. Using highly secure military-grade 256-bit encryption, your computer’s IP, and all of your personal data are highly protected from the prying eyes or scammers, hackers, and even Big Brother.

The Fastest VPN system is also highly compatible with a wide range of devices that run on most of the current most popular operating systems including; Windows, Linux, Mac (OSX). It can be put on more than 20 different types of devices and can even be used by up to 10 different devices.

No need to worry when you visit a local establishment that has free public WiFi available, your VPN tunnel connection is 100% secure and hackers can get you and no one can gain access to whee you are.

10 – Vypr VPN

Vypr VPN review

Vypr VPN is a powerful VPN service provider that offers one of the most secure of all VPN companies. Using the highest quality, military-grade encryption will keep all of your personal data protected.

You will not be able to be tracked by hackers, scammers, and hackers looking to steal your information. Once you have the app installed and up and running on any of all your devices you will be able to enjoy your Sunday. No worries about scammers who might be using your IP to gain access to your computer.